

How To Build A Raised Garden Box With Vinyl Fence Boards
Difficulty
Beginner
| 
Easy and inexpensive DIY cedar rasied garden beds with free plans by Ana-White.com! Uses cedar fence pickets to keep costs low and basic tools. Beginner friendly.
You can find the double width plans here.
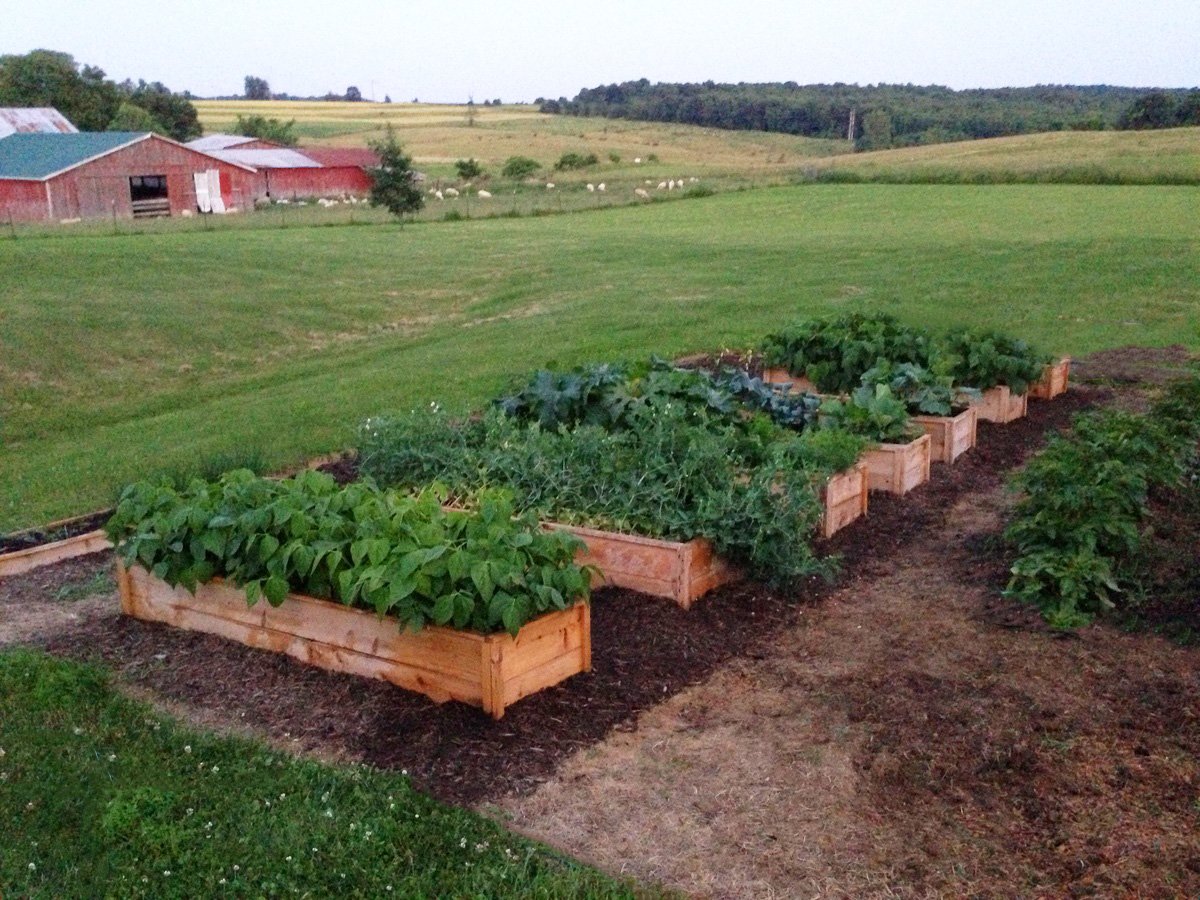
Photo by JESSICA9777
Why Raised Garden Boxes?
We love raised garden boxes because it's less to weed, brings your working height upward, and uses less soil. It's also great for soil drainage, preventing soil compaction, and keeping unwanted pests out.
We love that raised beds warm up earlier in the spring (so you can plant earlier).
How Much Do Raised Garden Beds Cost?
The downside of raised garden beds is they can be expensive - in the hundreds of dollars depending on the size. Multiply that by an entire garden worth of raised beds and the cost just becomes prohibitive.
The Secret: Use Cedar Fence Pickets
For a planter, you want to use natural wood because treated lumber releases odors and chemical that you don't want mixed in with your food. And cedar naturally resists rot and insects, so a great choice for planters. But standard cedar boards can be expensive.
Cedar fence pickets are made of real cedar and are designed to last and last in the exterior elements. They cost less than $2 for a 1x6 board, 6 feet long - just a fraction of the cost of a standard cedar board.

I used six boards to build this cedar raised bed, and spent righyt at 10 dollars in lumber (the screws will add a little to the cost)

This exact cedar planter has lasted over ten years without any issues. We have been very happy with this project and are planning on building more for our garden at our new house.
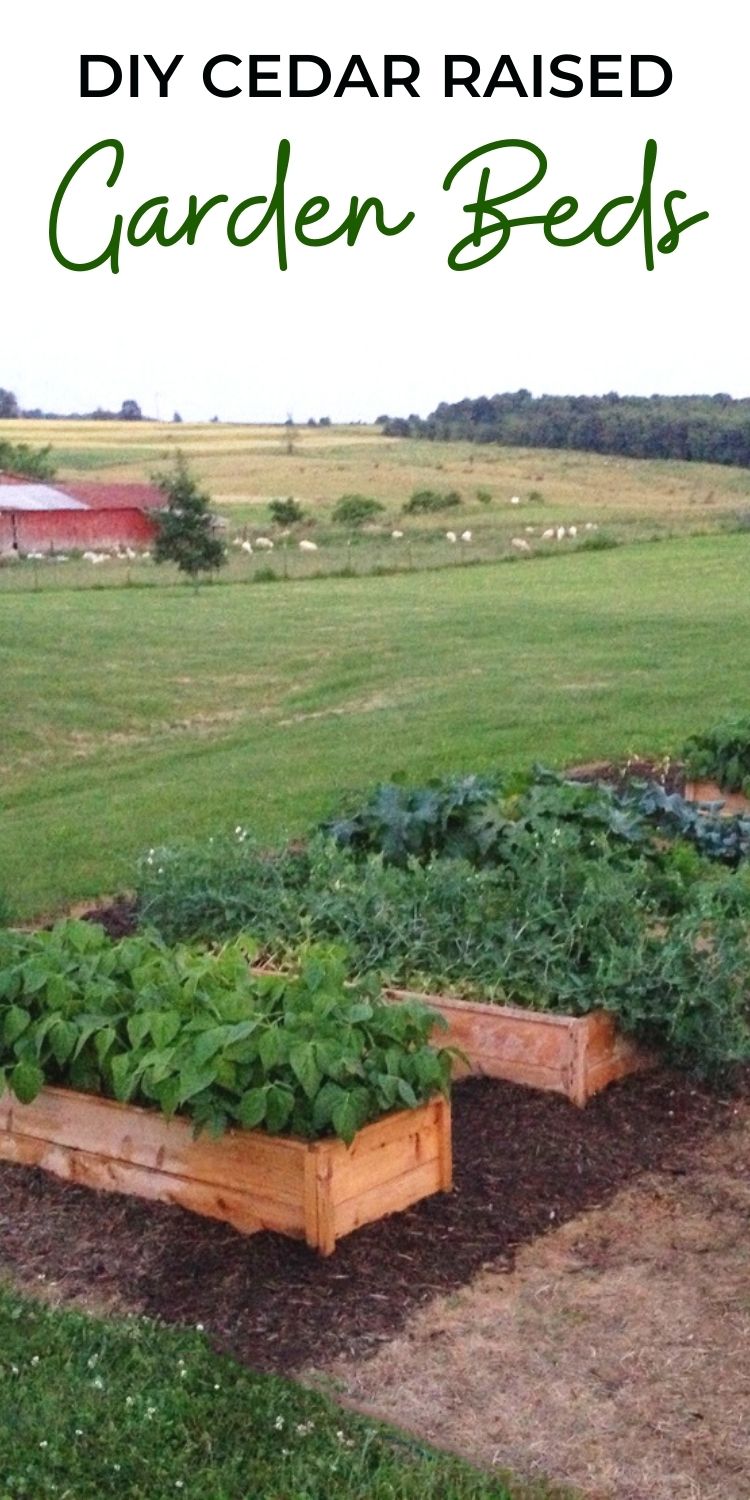
Pin For Later!
Dimensions
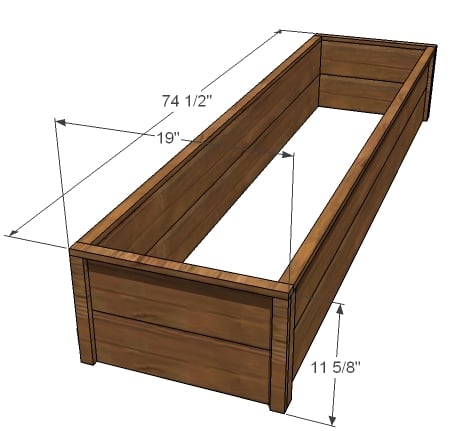
Dimensions are shown above.
Preparation
Shopping List
6 Cedar Fence Pickets
1x2 Cedar boards for corners (if you don't have a tablesaw)
1″ Screws
2″ Screws
Wood Glue
Finishing Supplies
Garden stakes or concrete stakes (we used a couple of stakes on each bed just to keep the bottoms in place)
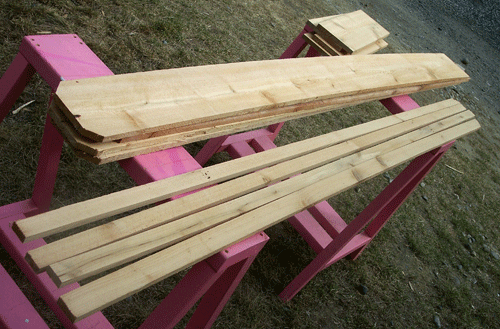
Cut List
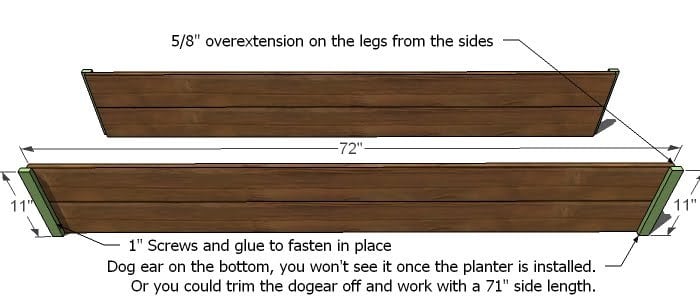
4 – 1×6 Fence Pickets @ 72″ (Side Panels, you can trim the dog ear off and work with a 71″ Fence post)
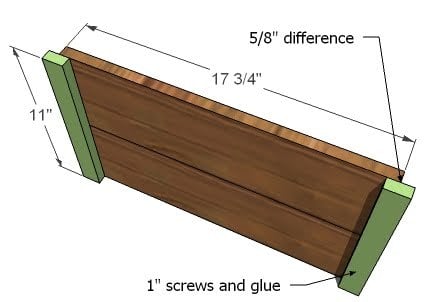
8 – 1×2 Fence Pickets @ 11″ (Corner Posts)
4 – 1×6 Fence Pickets @ 17 3/4″ (End Panels)
Optional Top Trim - CUT TO FIT
2 – 1×2 Fence Pickets @ 72″ (Top Trim, I used the non-dogeared ones from the center of the cuts)
2 – 1×2 Fence Pickets @ 19″ (Top Trim, Ends)
Cutting Instructions
Considerations for Size Modifications
If you alter the dimensions of the cedar beds, work with your materials to make sure you have the least waste (and more cedar beds!) For example, make your end panels a fence picket cut in half for a 6 foot by 3 foot garden bed.

Instructions
Step 1
Optional: Rip your Corner Posts
I've done the math, and by ripping one fence post into 4 – 1 1/4″ wide strips, you are saving quite a bit of money (well, that is, if you intend to build a garden full of planters). So set your tablesaw to 1 1/4″ and rip one of the fence posts to 1 1/4″ wide, as shown above.
Or Use 1x2 Cedar Boards
If you don't have a table saw, you can use 1×2 cedar boards.
Step 2
Side Panels
Use your 1″ screws and glue to put together your side panels as shown above. The post will overextend the sides by 5/8″ as shown above.
I also used my Kreg Jig™ to join the boards together in the center (optional) or you can use a 1x2 in the center.
Step 3
End Panels
Build your end panels exactly like your side panels.
Step 4
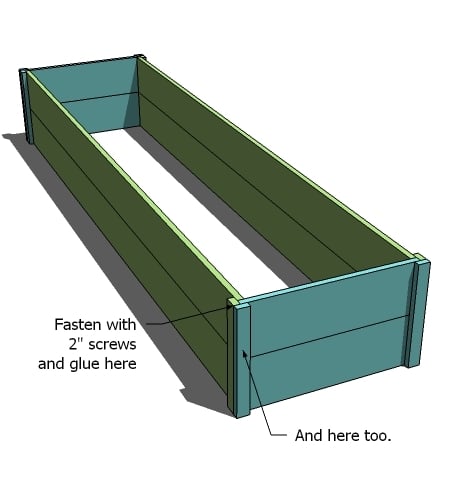
Assembling the Panels
The panels should fit together like a puzzle. Fasten with 2″ screws and glue. Check for square.
Step 5

OPTIONAL: Measure and cut your top trim to fit. Attach to the top.
How To Build A Raised Garden Box With Vinyl Fence Boards
Source: https://ana-white.com/woodworking-projects/cedar-raised-garden-beds-made-fence-pickets-single-width
Posted by: fernandezbeadis.blogspot.com
0 Response to "How To Build A Raised Garden Box With Vinyl Fence Boards"
Post a Comment